This example takes advantage of several features within AGK to demonstrate how to move a player in a game, it contains the following:
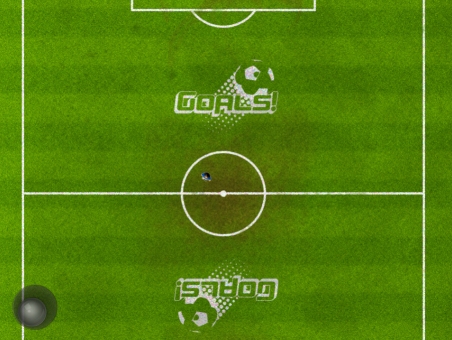
Here's what the program looks like when running:
The initial set up code will deal with these tasks:
When using the default percentage based system it will be necessary to select a display aspect, which is responsible for controlling the ratio of the screen. An aspect of 4 / 3 is chosen, which is effectively the same as the iPad resolution of 1024 x 768. You can test this by checking the results of 4 / 3 and 1024 / 768 (both of these give a result of 1.333). Setting the display aspect to 4 / 3 will mean that our example will cover the whole screen on the iPad, as it has the same aspect ratio. Other platforms may have different aspect ratios, for example, the landscape iPhone resolution is 480 x 320 and when divided this gives us a result of 1.5, therefore when running this example on the iPhone there would be small black borders on screen to ensure the aspect ratio of 4 / 3 is enforced.
SetDisplayAspect ( 4.0 / 3.0 )
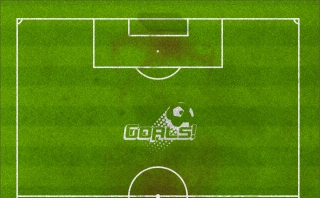
The pitch graphics are split into two with pitch_top.jpg containing the top half of the pitch:
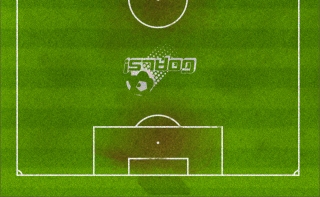
And pitch_bottom.jpg contains the bottom half of the pitch:
The top half of the pitch is loaded and has its ID specified as 1. This sprite needs to cover the whole of the screen on the X axis so SetSpriteSize has 100% passed in for the X parameter. A value of -1 is used on the Y axis so that the correct height is automatically calculated based on the width.
LoadImage     ( 1, "pitch_top.jpg" )
CreateSprite  ( 1, 1 )
SetSpriteSize ( 1, 100, -1 )
A similar process is repeated for the bottom half of the pitch, except this time ID 2 is used for the pitch image and the sprite. The Y position is calculated based on the height of the top half of the pitch, which will result in the bottom half being placed directly under the top half.
LoadImage     ( 2, "pitch_bottom.jpg" )
CreateSprite  ( 2, 2 )
SetSpriteSize ( 2, 100, -1 )
SetSpriteY    ( 2, GetSpriteHeight ( 1 ) )
The player sprite will utilise several images. The default standing image is named blue-standing.png and is shown here:

To create the player sprite the following code is used:
LoadImage         ( 3, "blue-standing.png" )
CreateSprite      ( 3, 3 )
SetSpriteSize     ( 3, 2.5, -1 )
SetSpritePosition ( 3, 50, 50 )
The standing image is loaded into ID 3, then the sprite is created using an ID of 3, and its size set to 2.5% of the screen on the X axis with the size on Y axis being calculated automatically, finally the position is set to 50% on the X axis and 50% on the Y axis, which will place our player at the center of the screen.
Several animation frames are available that can be used when the player starts running across the pitch:


These frames of animation are added by calling AddSpriteAnimationFrame:
AddSpriteAnimationFrame ( 3, LoadImage ( "blue-running-1.png" ) )
AddSpriteAnimationFrame ( 3, LoadImage ( "blue-running-2.png" ) )
AddSpriteAnimationFrame ( 3, LoadImage ( "blue-running-3.png" ) )
AddSpriteAnimationFrame ( 3, LoadImage ( "blue-running-4.png" ) )
AddSpriteAnimationFrame ( 3, LoadImage ( "blue-running-5.png" ) )
AddSpriteAnimationFrame ( 3, LoadImage ( "blue-running-6.png" ) )
The player will be controlled by a virtual joystick, that will be placed on screen using the command AddVirtualJoystick:
AddVirtualJoystick ( 1, 8, 90, 10 )
An ID of 1 is specified for the virtual joystick, it is positioned at 8% on the X axis and 90% on the Y axis, finally it is set to have dimensions of 10% by 10%.
At this point all of our graphics are in place - the football pitch and the player with animations, there is also a virtual joystick that will be displayed on screen. The next step is to consider what needs to happen within our main loop:
To retrieve input from the virtual joystick the commands GetVirtualJoystickX and GetVirtualJoystickY are called. These commands return a value between -1 and 1 that indicate any movement that has been applied to the joystick. Once we know this input the player's rotation, position and animation can be updated. Here's the process:
The commands GetVirtualJoystickX and GetVirtualJoystickY return any input from the virtual joystick:
joystickX# = GetVirtualJoystickX ( 1 )
joystickY# = GetVirtualJoystickY ( 1 )
The position of our player is obtained as follows:
x# = GetSpriteX ( 3 )
y# = GetSpriteY ( 3 )
Input from the joystick is subtracted from the player's position and stored:
x1# = x# - joystickX#
y1# = y# - joystickY#
At this point enough information is known so that the player's rotation can be updated, so that he is facing the correct direction. To achieve this a rotation angle is calculated based on the original location of the player and the direction it is moving in:
angle# = ATanFull ( x1# - x#, y1# - y# )


SetSpriteAngle ( 3, angle# )
The command ATanFull returns the angle in degrees for the direction passed in. This is followed with a call to update the angle of the player sprite.
The next step is to update the position of our player by adding to its original position input data from the joystick:
SetSpritePosition ( 3, GetSpriteX ( 3 ) + ( joystickX / 5.0 ), GetSpriteY ( 3 ) + ( joystickY / 5.0 ) )
The joystick input is divided by 5 before being applied to the player's position. This is done as a way of dampening the input and ensuring the player doesn't move around too fast. If no division occurred the player would race around the screen incredibly fast and if the division was higher e.g. 10 then the player would be very slow.
The screen is scrolled by taking the position of the player and subtracting 50%, therefore the view will always be centered on the player. There is no scrolling required on the X axis as we only need to control movement on the Y axis. There is also no check so the player can run off the pitch:
SetViewOffset ( 0.0, y# - 50 )
The only task remaining is to deal with animation. When there is no input from the virtual joystick any animation is stopped and the player's image is set to the standing image (ID 3). Whenever input is received if the run animation is not already playing then it is triggered:
if ( joystickX# = 0.0 and joystickY# = 0.0 )
    StopSprite ( 3 )
    SetSpriteFrame ( 3, 3 )
else
    if ( GetSpritePlaying ( 3 ) = 0 )
        PlaySprite ( 3, 10, 1, 2, 7 )
    endif
endif
Everything is now in place to run our program. All that's needed now is to lay out the final code and ensure Sync is called:
SetDisplayAspect ( 4.0 / 3.0 )


LoadImage     ( 1, "pitch_top.jpg" )
CreateSprite  ( 1, 1 )
SetSpriteSize ( 1, 100, -1 )


LoadImage     ( 2, "pitch_bottom.jpg" )
CreateSprite  ( 2, 2 )
SetSpriteSize ( 2, 100, -1 )
SetSpriteY    ( 2, GetSpriteHeight ( 1 ) )


LoadImage         ( 3, "blue-standing.png" )
CreateSprite      ( 3, 3 )
SetSpriteSize     ( 3, 2.5, -1 )
SetSpritePosition ( 3, 50, 50 )


AddSpriteAnimationFrame ( 3, LoadImage ( "blue-running-1.png" ) )
AddSpriteAnimationFrame ( 3, LoadImage ( "blue-running-2.png" ) )
AddSpriteAnimationFrame ( 3, LoadImage ( "blue-running-3.png" ) )
AddSpriteAnimationFrame ( 3, LoadImage ( "blue-running-4.png" ) )
AddSpriteAnimationFrame ( 3, LoadImage ( "blue-running-5.png" ) )
AddSpriteAnimationFrame ( 3, LoadImage ( "blue-running-6.png" ) )


AddVirtualJoystick ( 1, 8, 90, 10 )


do
    joystickX# = GetVirtualJoystickX ( 1 )
    joystickY# = GetVirtualJoystickY ( 1 )


    x# = GetSpriteX ( 3 )
    y# = GetSpriteY ( 3 )


    x1# = x# - joystickX#
    y1# = y# - joystickY#


    angle# = ATanFull ( x1# - x#, y1# - y# )
    SetSpriteAngle ( 3, angle# )


    SetSpritePosition ( 3, GetSpriteX ( 3 ) + ( joystickX# / 5.0 ), GetSpriteY ( 3 ) + ( joystickY# / 5.0 ) )


    SetViewOffset ( 0.0, y# - 50 )


    if ( joystickX# = 0.0 and joystickY# = 0.0 )
        StopSprite ( 3 )
        SetSpriteFrame ( 3, 3 )
    else
        if ( GetSpritePlaying ( 3 ) = 0 )
            PlaySprite ( 3, 10, 1, 2, 7 )
        endif
    endif


    Sync ( )
loop
The input systems provided within AGK can be used to handle most forms of input and allow you to concentrate on writing your game. As seen from this example only a few lines of code are needed to get a virtual joystick on screen and move a player around the game.
![]()
App Game Kit © The Game Creators Ltd. All Rights Reserved. Report an issue