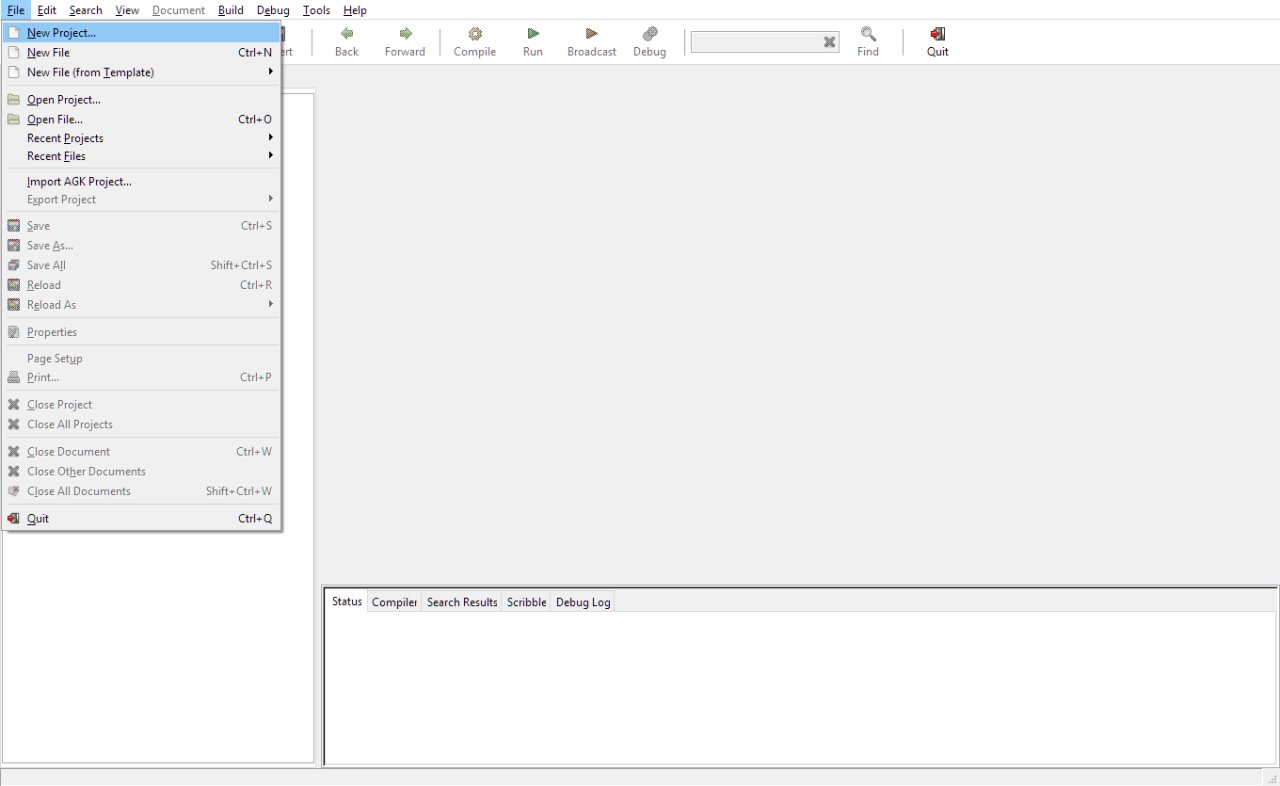
A project is a container for the source code that will be used to make your project. To create a project go to the File menu and select New Project.
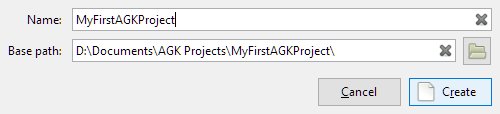
A dialog box will appear prompting you for the Name and Base Path of the project. Give your project a name e.g. "MyFirstAGKProject" and select a location where it and any files it requires will be stored. The default location for the project will be your "My Documents" folder on Windows e,g. C:\Users\Your Name\Documents. On the Mac it may be Users/Your Name/Documents. It's a good idea to use the default locations, as they are easily accessible. When you have filled in the dialog with the Name and Base Path press the Create button to confirm your options and let the IDE generate the project files.
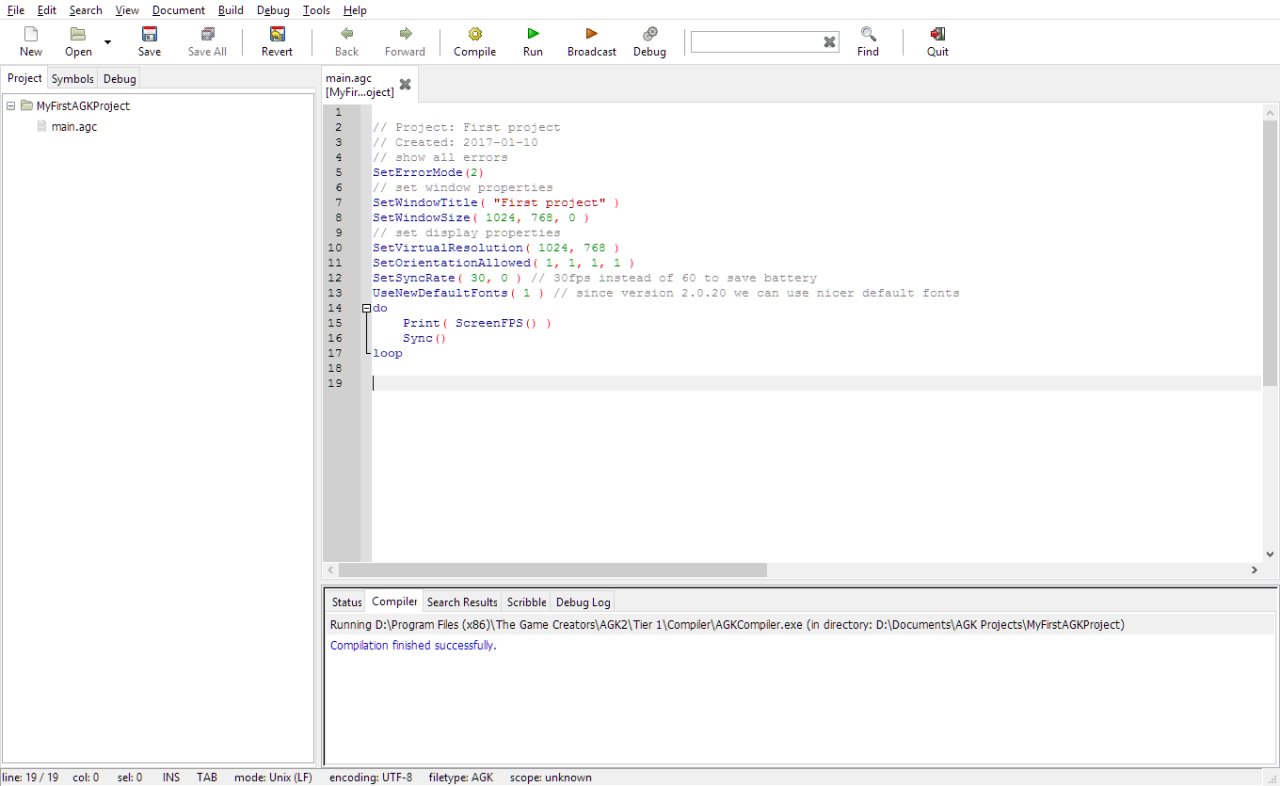
When the project is created, by default a file is made called main.agc. This will be the starting point for your application. This file will be listed in the Sidebar under the Project tab. Double click on it to open the file and see its contents in the main editing area.


![]()
App Game Kit © The Game Creators Ltd. All Rights Reserved. Report an issue